Non-Fungible Tokens (NFTs)
NFTs are unique, one-of-a-kind tokens that are built on blockchain technology, allowing for secure ownership and transfer of these assets.
Every token is assigned a unique identification code(ticker) and metadata that distinguish it from every other token.
The flow of issuing and transferring non-fungible tokens is:
- register/issue the token - this step creates an empty collection;
- set roles to the address that will create the NFT/SFTs;
- create the NFT/SFT;
- transfer quantity(es).
Issuance of NFT tokens
Non-Fungible Tokens(NFTs) are issued via a request to the Metachain, which is a transaction submitted by the Account which will manage the tokens.
The issuance transaction must provide the following:
- Token Name;
- Token Ticker;
- Additional Properties (Optional).
mxpy token issue-non-fungible \
--token-name <Token Name> \
--token-ticker <Token Ticker> \
--proxy <Devnet or Testnet Proxy> \
--pem <Path to Wallet>
Optionally, the properties can be set when issuing a token. Example:
mxpy token issue-non-fungible \
--token-name <Token Name> \
--token-ticker <Token Ticker> \
--cannot-freeze \
--cannot-wipe \
--cannot-pause \
--cannot-change-owner \
--cannot-upgrade \
--cannot-add-special-roles \
--cannot-transfer-nft-create-role \
--proxy <Devnet or Testnet Proxy> \
--pem <Path to Wallet>
Practice
Let's create our first NFT collection. We will make a transaction to the testnet blockchain via mxpy tool. To install the tool check the prerequisites section.
mxpy token issue-non-fungible \
--token-name BPDAExampleToken \
--token-ticker BPDA \
--proxy https://testnet-api.multiversx.com \
--pem ~/multiversX/keys/shard0.pem \
--send
We called the issueNonFungible built-in function, signed the transaction with a PEM file for blockchain authentication, and used the testnet proxy. This transaction does an automated payment of $0.05$ EGLD.
Let's check our NFT collection on blockchain:

Observe that the Collection Name (which is also known as token ID) is BPDA-ee1eda. This is formed using the ticker provided,"-" and 6 random hex numbers.
Also, observe the name BPDAExampleToken which is the one we provided.
Lastly, observe that we have an empty collection, with no NFTs.
Practice - your turn
- Create an NFT collection.
Assigning roles to an NFT Collection
Roles can be assigned by sending a transaction to the Metachain from the ESDT manager. Within a transaction of this kind, any number of roles can be assigned (minimum 1).
mxpy token set-special-role-nft \
--<Role Assigned> \
--token-identifier <Collection Identifier> \
--user <Address to Assign the Role(s)> \
--pem <Path to Wallet> \
--proxy <Devnet or Testnet Proxy> \
--pem <Path to Wallet>
You can determine which roles to assign based on your requirements by consulting the command mxpy token set-special-role-nft --help.
To assign the NFT creation role to an address for a specific collection, use nft-create role.
NFT fields
Below you can find the fields involved when creating an NFT:
- NFT Name
- The name of the Non-Fungible Token;
- Quantity
- The quantity of the token. It must be 1;
- Royalties
- Allows the creator to receive royalties for any transaction involving their NFT;
- Base format is a numeric value between 0 an 10000 (0 meaning 0% and 10000 meaning 100%)
- Hash
- Arbitrary field that should contain the hash of the NFT metadata;
- Can be left an empty string when building the transaction to create the NFT;
- URI(s)
- Attributes
- Represents additional information about the NFT, like picture traits or tags for your NFT/collection;
- The data you provide must be formatted in hexadecimal and follow this exact structure:
metadata:ipfsCID/fileName.json;tags:tag1,tag2,tag3; - Below you can find a sample for the extra metadata format that should be stored on IPFS:
{
  "description": "This is a sample description",
  "attributes": [
    {
      "trait_type": "Background",
      "value": "Yellow",
      "{key}": "{value}",
      "{...}": "{...}",
      "{key}": "{value}"
    },
    {
      "trait_type": "Headwear",
      "value": "BlackBeanie"
    },
    {
      "trait_type": "SampleTrait3",
      "value": "SampleValue3"
    }
  ],
  "collection": "ipfsCID/fileName.json"
}
NOTE
Please note that every argument encoded in hexadecimal format must contain an even number of characters
You can also create Semi-Fungible Tokens (SFTs). For more details on the differences between NFTs and SFTs, please read the official documentation.
Creation of an NFT
A single address can own the role of creating an NFT for an ESDT token. This role can be transferred by using the ESDTNFTCreateRoleTransfer function.
An NFT can be created on top of an existing ESDT by sending a transaction to self that contains the function call that triggers the creation. Any number of URIs can be assigned (minimum 1).
mxpy token create-nft \
--token-identifier <Token Identifier> \
--initial-quantity 1 \
--name <NFT Name> \
--royalties <Royalties> \
--hash <Hash in Hexadecimal Encoding> \
--attributes <Attributes in Hexadecimal Encoding> \
--uris <URI> \
--pem <Path to Wallet> \
--proxy <Devnet or Testnet Proxy> \
--send
Transfer NFT Creation Role
The role of creating an NFT can be transferred by a transaction like this:
mxpy token transfer-nft-create-role \
--token-identifier <Token Identifier> \
--user <Address to Assign the Role> \
--proxy <Devnet or Testnet Proxy> \
--pem <Path to Wallet> \
--send
Change NFT Attributes
An user that has the ESDTRoleNFTUpdateAttributes role set for a given ESDT, can change the attributes of a given NFT/SFT.
NOTE
ESDTNFTUpdateAttributes will remove the old attributes and add the new ones. Therefore, if you want to keep the old attributes you will have to pass them along with the new ones.
This is done by performing a transaction like this:
mxpy token update-attributes \
--token-identifier <Token Identifier> \
--token-nonce <NFT nonce> \
--attributes <Attributes in Hexadecimal Encoding> \
--proxy <Devnet or Testnet Proxy> \
--pem <Path to Wallet> \
--send
Transfers
Performing an ESDT NFT transfer is done by specifying the receiver's address inside the Data field, alongside other details. An ESDT NFT transfer transaction has the following form:
mxpy tx new \
--token-transfer <Extended Token identifier Format> <Quantity> \
--proxy <Devnet or Testnet Proxy> \
--receiver <Address to the Receiver> \
--pem <Path to Wallet> \
--send
Branding
Here is SubcarpatiOGs NFT Collection.
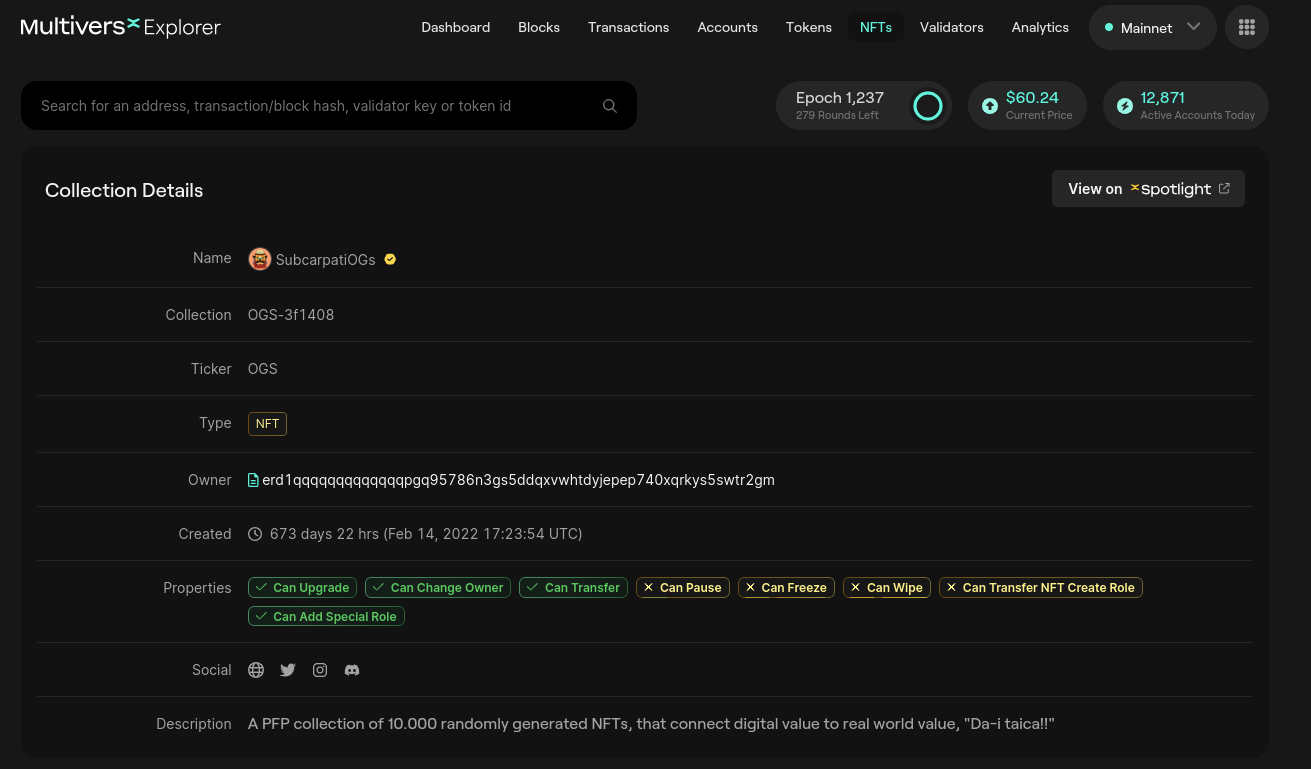
Observe that there are Social links, a Description and you can even see a Logo.
For branding you NFT collection please read the instructions.